

Are you looking for business cards for a networking event tomorrow, but don’t have time or money to spend on professional printing? Ordering custom cards online may take 2–5 business days, and could cost more than their monetary worth—money and time you don’t have.
With Google Docs, you can create cards for free, and they are accessible on any device that has an internet connection. No complicated or expensive graphic design software, no delivery waiting period, and no designer fees.
This step-by-step tutorial shows you exactly how to make a business card on Google Docs—from page setup to final printing—so you can create professional-looking cards today without breaking the bank.
Why Use Google Docs for Business Cards?
Free and Accessible
Google Docs costs nothing and works on any device with internet access. You don’t need to spend a lot of money to purchase software such as Adobe Illustrator or Adobe Photoshop. Furthermore, your designs automatically save to Google Drive, so they’re easy to retrieve from anywhere.
Beginner-Friendly
Most people have used Google Docs for creating documents; therefore, the interface is already familiar to them, and it is an easy way to create a simple card without requiring any design skills. Creating a professional-looking card is simple enough by formatting text and inserting an image.
When Google Docs Works (and When It Doesn’t)
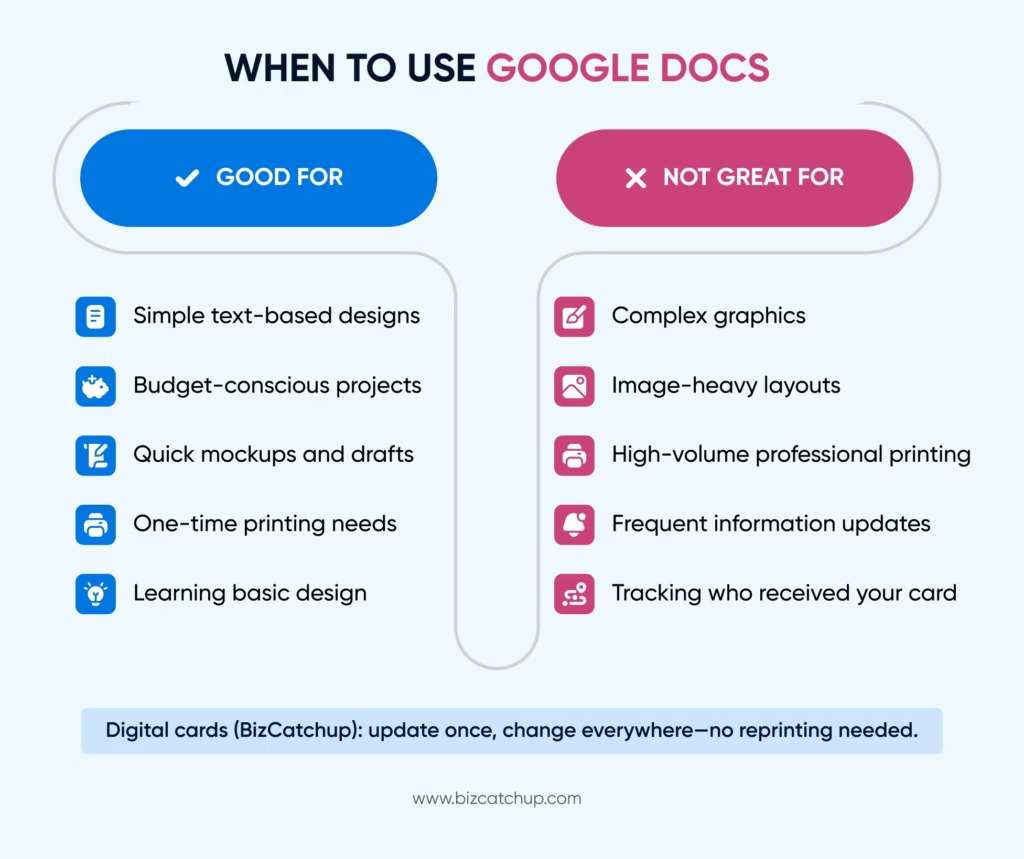
Ideal for: Simple text-based designs, projects on a budget, quick mock-ups and single-time printing.
Not great for: Complex graphics, image-heavy layouts, or very high-volume professional printing. Digital business cards like BizCatchup have much more versatility than paper business cards if you do a lot of professional networking, because you only have to make one change to your business card, and it will automatically update for everyone that you sent a business card to.
Step-by-Step: How to Make a Business Card on Google Docs
Step 1: Set Up Your Document
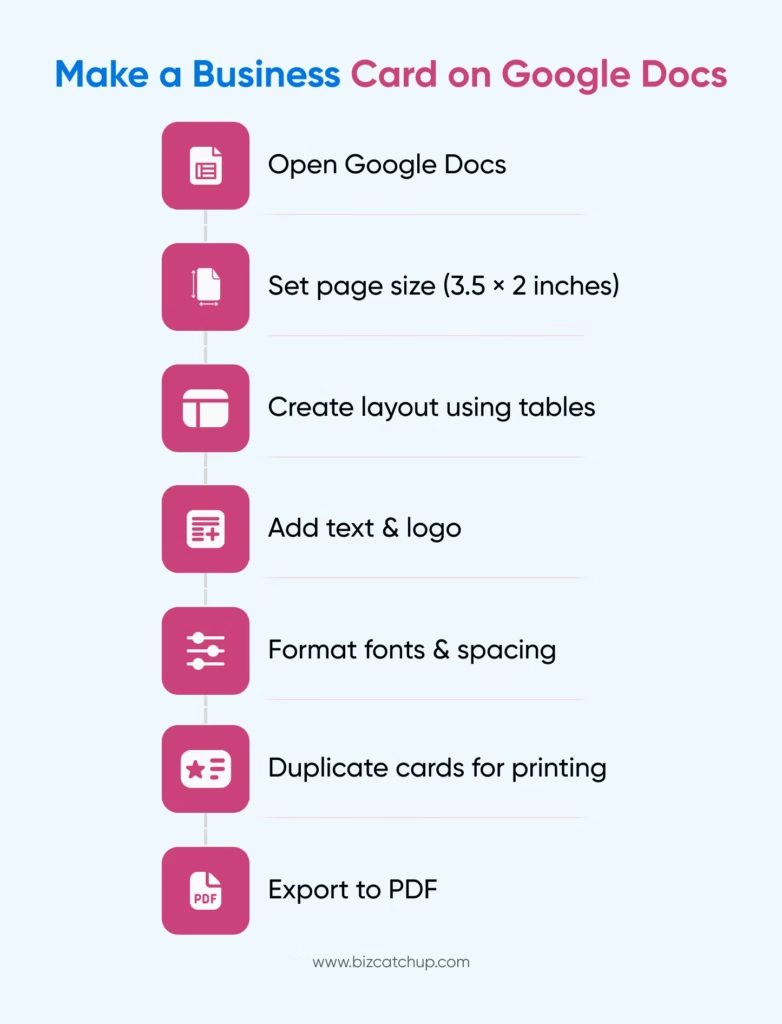
In Google Docs, create a blank document. From there, choose File, then Page setup, and set the dimensions of your document to 3.5 × 2 inches (standard size for business cards). Set the margins to 0 inches on all sides and select Landscape orientation. Click “OK” when done.
Step 2: Choose Between a Template or a Custom Design
To find templates for pre-designed layouts, search “business card” in the Google Docs template gallery. While templates can be useful because they save you time, they typically don’t provide as much customization as building out your own blank document from scratch.
Step 3: Add Your Essential Information
Include only what matters:
- Your name (largest, most prominent)
- Title or role
- Phone number
- Email address
- Website or LinkedIn (optional)
- Company logo (if applicable)
Skip multiple phone numbers, full addresses, or social media handles unless critical to your work.
Step 4: Format and Design
When learning how to make a business card on Google Docs, formatting and design play a crucial role in making your card look professional and easy to read.
Using Insert, then Drawing, and selecting Text Box will allow for positioning text throughout the card with greater control than just typing in text.
Choose font(s): Use professional fonts like Arial, Helvetica or Georgia. Limit to two fonts (one for your name and one for the rest).
Choose the size of font: Name at 14-18pt and contact at 10-12pt. Always check the readability at actual size by setting zoom to 100%.
Visual elements: Add subtle lines or shapes using the Drawing option in the Insert tab for visual separation. Keep generous white space—don’t fill every inch.
Step 5: Add Logo or Image (Optional)
From Insert, go to Image and choose Upload from the computer. Keep images simple and high-resolution (300 DPI minimum). Position strategically—top corner or centred, depending on your layout.
Step 6: Create Multiple Cards Per Page
As you finalize business card template in Google Docs, creating multiple cards on a single page helps you print efficiently.
Create a table that has 5 rows and 2 columns (Table in the Insert tab). Next, make a copy of your card design and place that into each of the 10 cells (creating 10 cards per standard 8.5″x11″ sheet).
If the cards do not fit perfectly, right-click on the table and select Table Properties, then Cell Padding to adjust the cell padding.
Step 7: Review and Export
Make sure to proofread everything, especially telephone numbers and email addresses. Have a co-worker help proofread, too. Once you have proofread everything, go to File, then Download, and select PDF Document, so that the PDF format will maintain the card’s format and avoid any changes in layout.
Tips for Better Google Docs Business Cards
Design Tips
Keep it simple—if a card is cluttered, it will be disposed of. If your brand has established its brand colours, then use those. Otherwise, stick with traditional black text on a white background. Use one type of alignment: Left, centre, or right, and be consistent throughout the entire card.
Technical Tips
- When finalizing how to make a business card on Google Docs, always save your file as a PDF before printing to avoid formatting issues.
- Your images should be at least 300 DPI (dots per inch) so they do not appear pixelated after being printed.
- Use an 80-100 lb stock for a professional finish that does not easily bend.
Common Mistakes to Avoid
- Having too much information on your business card will make it impossible to read.
- Do not use a font smaller than 10 point (pt), as this can cause eye strain.
- Using a light grey on a white background can cause poor contrast due to different lighting conditions.
- Most importantly, always double-check your business card for typos in the contact information—one typo will make your entire batch worthless.
Printing Your Google Docs Business Cards
Home Printing
Using professional-grade, 80-100 lb cardstock provides that tough, professional feel. You should confirm that your printer settings are set to “actual size” with no scaling before you print. To ensure the alignment is correct, first print one test page on standard paper, then print out your expensive cardstock material once all is correct.
Professional Printing
Once you’ve completed your design while learning how to make a business card on Google Docs, export it as a PDF and upload it to Vistaprint, Moo, or a trusted local print shop.
Professional printing delivers better quality than home printers—especially for larger batches. You’ll get superior paper options, cleaner cuts, and often better pricing on bulk orders.
Digital Alternative
For professionals who frequently change their contact information, using digital business card apps like BizCatchup offers an ideal solution.
The difference? Instead of printing and handing out paper, you share your business card instantly via QR code or directly within the BizCatchup app—no physical cards needed. Recipients scan your QR code with their phone camera, and your complete contact information saves to their device automatically.
Even better: Update your information once in the app, and everyone who received your card sees the changes instantly—no reprinting, no waste, and built-in analytics show you who viewed your card and when.
For professionals building connections for business, this seamless sharing and automatic updating eliminates the constant reprint cycle paper cards require.
When to Consider Digital Business Cards Instead
Limitations of Paper Cards from Google Docs
- Outdated every time you switch jobs or change your contact info.
- Cannot track who received your cards.
- No way to measure engagement or analytics.
- Manual updates require complete reprinting.
- Running out of cards at critical moments.
Digital Business Card Benefits
As you explore how to make a business card on Google Docs, it’s also worth understanding what digital business cards can do beyond static designs.
- One-time update is reflected immediately across all cards.
- Track who viewed your card and when.
- Share by QR code, NFC or link. No print necessary.
- Never run out of cards.
- Analytics provide insights into engagement levels.
- Auto-follow-up with your CRM integration.
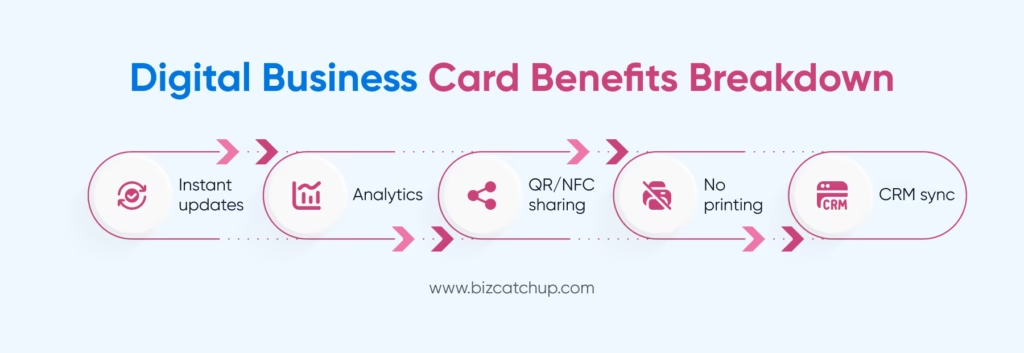
Using platforms such as BizCatchup will make business card creation easier than using Google Docs.
Final Thoughts
Google Docs enables you to create your own basic business card for free. This tool is ideal for beginners, those on a budget, or those who need something quickly. Using the steps outlined above, you can create a professional-looking card.
If you do a lot of networking and your contact info may change often, digital business cards give you flexibility, the ability to track contacts, and convenience. Therefore, you won’t need to frequently print new cards.
How to make a business card on Google Docs step by step for beginners?
To understand how to make a business card on Google Docs, start by opening a blank document, adjusting the page size to card dimensions, adding a table for layout, and inserting your details like name, contact info, and logo. Keep spacing clean and readable.
What size and format should I use when making a business card on Google Docs?
The standard size of the business cards is 3.5 x 2 inches. As you learn how to create your own business card in Google Docs, you will want to set your page margins to custom size, using table formatting for alignment, and exporting as PDF format for printing and or distributing electronically (for example: email attachment).
Can I create a professional-looking business card on Google Docs?
Yes, you can create a well-designed business card in Google Docs. To create a professional-looking business card, focus on using one or two consistent fonts, shapes, icons, and colors. Focus on contrast, white space, and hierarchy to ensure your card looks polished and modern.
How to make a business card on Google Docs for digital sharing instead of printing?
If you’re exploring how to make a business card on Google Docs for digital use, include clickable links, minimal text, and export it as a PDF or image. This makes it easy to share via email, messaging apps, or QR codes.
What details should I include when making a business card?
When deciding how to make a business card on Google Docs, include your full name, designation, contact details, website or portfolio link, and optionally social profiles. Keep it concise so recipients can quickly understand and connect with you.
